

HOW WE MAKE TRAILERS
The written version of the Polden workshop's video guide: the full route from first look at the game to final cut.
Introduction
A good trailer isn't just a slick montage cut to music. Behind every strong trailer there's a pile of decisions: what to show first, which mechanics to pick, how to explain a game in a couple of minutes, how to hold attention, and how to carry not only the information but the feel of the game itself.
A few years ago we started talking a lot with indie developers: we took their trailers apart and discussed how best to show their games. It quickly became clear that very different projects kept raising the same questions. Then our workshop appeared inside the Polden publishing house, we started making promo content ourselves - and heard the same questions inside our own projects.
At some point it became clear: these aren't individual problems, and it isn't that someone “can't do it”. It's that nobody had a map of the process. At first glance it looks as though taste or creative instinct decides everything. In fact craft decides it - a process you can break into stages, describe and repeat.
This guide is our map of that process. It covers the whole route of making a trailer, from first look at the game to final cut, and along the way we'll go through:
The guide is for developers, producers, writers, video editors, content teams - and anyone who wants a better understanding of how game trailers work.
What makes a good game trailer?
Before we get into the pipeline and tools, we need to get one thing straight: what do we even mean by a good trailer? Because without a clear definition, everything falls apart. One person says there's not enough action. Another says the atmosphere isn't coming through. A third wants more mechanics. They're all kind of right - and you still have nothing to work from.
Especially today, when a trailer doesn't exist on its own. For indie games it's less and less about how the trailer performs on YouTube or Steam, and more about how easily you understand the game from it. How easily you can describe it to someone else. How easily it can be cut up and spread around - into reviews, roundups, TikToks, Shorts. Today, a trailer that clearly shows what a game is, shared by the right creator, can bring it more attention than a token slot in a major showcase that people simply scroll past.
So a trailer is a kind of container for the game. It holds the essence, the strengths, the look, the mood - and the raw material for everything you say about the game afterwards. Which is why what you need here isn't a matter of taste - “I don't know, I just think it should be punchier” - but a simple working formula you can start from. And we have one.

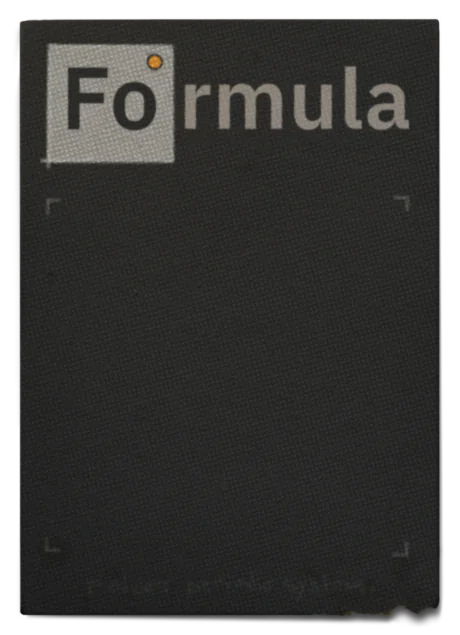
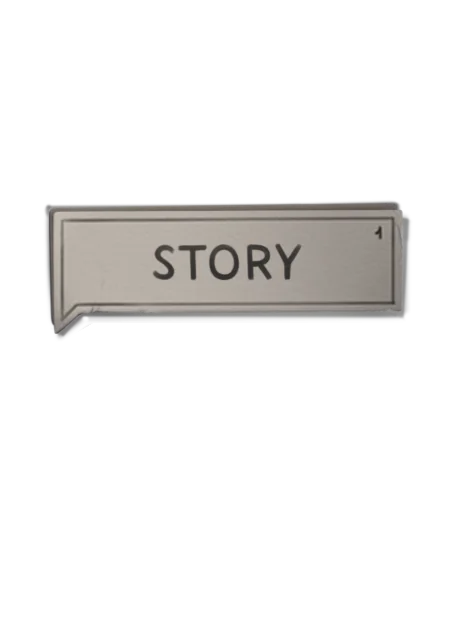
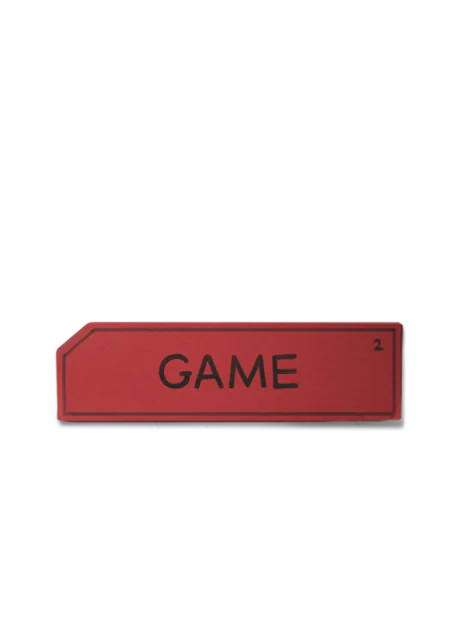

It sounds too simple - but that's exactly where its strength is. Behind those three simple parts there's a whole system. Let's unpack it.
A STORY
A good trailer is first and foremost a story. And here comes the uncomfortable part: if you can't tell a story, you can't make a good trailer. However beautiful your game is, however good the assets and the graphics. Even when the game has no story in the usual sense - a puzzle game, a simulator, a sandbox - the trailer still needs a narrative structure of its own.
Because in a story, just like in a game, we build an experience and walk the viewer through it. And if that experience is badly built - if it doesn't develop, if it leads nowhere - people just lose interest and drop off. So knowing the basics of storytelling isn't optional. It's a requirement.
ABOUT THE GAME
A trailer is a story about the game. This is where we often go wrong: we start talking about something abstract - the mood, the vibe. All of that matters, of course, but if the game itself and the experience of playing it don't come through, you have a problem. A good trailer has to answer at least three basic questions:
So the viewer has to understand what it's like to play this gameBut there's an important catch: a trailer is a short format, and we can't show everything. So we have to pick out only the strongest, the most gripping - and manage to tell that in pictures. Which is where we go next.
PICTURES
The third part of the formula - a story about the game, told in images. Today that's the most effective form there is: more immediate, faster, more emotional. But visual language is still a language - and you have to speak it. That means understanding how a shot works, how editing works, rhythm - and, of course, having a trained eye.
But a trained eye isn't just “I watch films, ads, trailers”. A trained eye is when you watch, take it apart, and understand why it works: why this shot feels tense, why that scene lets you relax, why another one grabs you and keeps you watching to the end. If your story is told in images, you have to learn to speak that language. Not just watch - see how it's made.
OUR APPROACH
We have the formula, but a trailer doesn't build itself from a formula - it has to turn into concrete steps. We've got 20+ games on our slate right now, and new ones keep coming. For each game we make at least three key videos - announce, demo, release - which adds up to a whole lot of trailers. Under that load you can't reinvent the process every time, so we need a repeatable system: not bureaucracy for its own sake, but a clear route that helps the team get from an idea to a finished video without losing the point along the way. We split that route into three big stages.


RESEARCH
Here two processes start in parallel. The producers prepare the document everything else stands on — the Game Brief (it reaches the workshop a bit later). Meanwhile the team starts on step one.
Step 1First look
We dig into the game from every angle: we go through the GDD and the lore, download the build and play it, talk it over, write down our impressions, check the tech side - what can actually be used, what to capture, how, where, and what the limits are.
The “First look” step card on the boardIF LESS MATERIAL ARRIVES THAN YOU'D LIKE
The ideal incoming package is the Game Brief, the trailer brief, the GDD and a content build. In practice it rarely arrives complete: on indie projects the documentation often can't keep up with development, and there may be no GDD at all and never will be. That's no reason to stop, and no reason to work blind. We relax the requirements for the package, but we still need the answers - we just get them from other sources.
A conversation with the team only works if you come with a frame, otherwise you and the developer will just play through the game again. The order is this: first the Game Brief and an hour or two of playing it yourself - so that you have questions; then the conversation with the developers, with a list of hypotheses - “we want to show this, walk us through it”; then a targeted check in the build against the scenes you've picked. The point is that “what actually triggers this effect?” gets asked on day one, not day four.
Game Brief
In parallel the Game Brief arrives. The Game Brief isn't just a document - it's a structured description of the game from a marketing point of view: what the game is, what it does best, who it's for and how to present it. It's split into several blocks, and four of them matter most to our team:
All of it goes in one place — the research board. That's our database - what we build the narrative from; we also add our own research there, on the genre, on similar games and on audience surveys.
Step 2Finding hooks
Now the job is to pull out the strongest parts of the game: the moments that catch attention, read fast on screen, and carry the experience of the game best. We call them hooks. At this stage we're not thinking about structure yet - we're just answering one question: what in this game could hook someone? In Submarine, for example, that could be the accidents, the alarm, the confined space, the crew falling out, strange signals, creatures, the weight of every decision. Every hook we find goes into one long list - no filtering yet.
The “Finding hooks” step card on the boardStep 3Hook categories
Now the work gets more precise: we take the hook list and group it into categories - world, mechanics, characters, danger and conflict, intrigue, choice, wow moments. The list of categories is open-ended: it exists not for its own sake but to show the balance. Because sometimes it seems the game has plenty of strong moments, and then you lay them out by category and you see: every hook is “look what a beautiful world”, and zero hooks about what you actually do in the game. Or it's all action with no sense of the mechanics. This step makes it obvious where you have too much and where something is missing.
For co-op games one more category can be added — co-op. This is about messing about together: how players bail each other out and how they fail together. For a co-op game it's often the strongest hook of all, because that messing about is exactly what creates the feeling that you aren't watching a video but sitting in a session with friends.
The “Hook categories” step card on the boardStep 4Genre experience
We've broken the game down into hooks and sorted them into categories - now we need to find what matters most. For that we go back to the Game Brief: it already says what experience the player comes for first. Not which genre, but what the person wants to feel while playing. That's what we call the genre experience.
Then we run every hook through that genre experience - sorting out which ones deliver it directly, which reinforce it, and which point somewhere else entirely. Submarine had plenty of everything: the underwater world, managing the crew, technical systems, exploration, events, choices. But the Game Brief made it clear the core was tension, claustrophobia and deciding under pressure. So we filter: the accidents stay (they create stress), we lean harder on the confined spaces and on the conflicts inside the crew; calm exploration moves to the background, and exploring under pressure moves to the front. What we end up with isn't just a list of good moments - it's a set of hooks all pulling in one direction, towards a single genre experience.
The “Genre experience” step card on the boardStep 5Overview and tech overview
What you find has to come together in two documents. Studying the game and the genre is a job in its own right, not an add-on to the concept that follows.
Game overview — an analytical overview of the project and its strengths: the game presented to the whole team, and the reference point we come back to at later stages. We assemble it on the research board. The rule is simple: work on the project starts after the overview, not before.
Tech overview — the technical breakdown: what's in the game and how to get at it. We lay out and take apart the resources - models, characters, props, locations, cheats - and look at each one separately: which locations you can reach, how an object behaves, what you can control, what capture options are built in. The editor keeps this document, and it doubles as the list of what can really be captured.
Step 6Producer check
Before moving into narrative, we check with the producer that everything is in place: did we read the game, the audience and the priorities right, is the material gathered on the board, are the hooks and the genre experience agreed, are the tech options clear. This is the first of three producer checks - the next come after the script and at the final cut.
The “Producer check” step card on the boardThe stage ends with the thing that matters most: we know what in the game is worth telling the player about. But this still isn't a trailer - it's raw material. Now it has to become a clear, coherent story.
Narrative
We take everything we've dug up - the hooks, the genre experience, the strengths - and start building a story out of it, one we'll later turn into pictures. For now we do it in text: we work out the logic of the story, build its structure, strengthen it with drama, put the game experience into words, choose a concept, assemble the outline, and only then write it all up as a script.
Step 1Story logic
We have the content for the story - now we need to work out the logic: what order the scenes and events come in. Simple to complex? Calm to tense? Or the other way round - we throw the viewer into chaos and only then start explaining? There are plenty of options, but in our experience most good trailers are built, one way or another, on the logic of the core loop. It creates a natural sequence of actions: what happens first, what the player does, how the situation develops, where the tension appears, and what it all leads to. The viewer isn't just watching a set of scenes - they're living through a piece of the game.
Our job is to pull the loop out of the game and put it as simply as possible. In Submarine, for example, it goes like this: a breakdown or a threat, reaction (repairing, managing), things get worse, pressure builds, a decision about what to save and what to sacrifice, consequences, a new problem - and the loop starts again. That loop becomes the basic logic of the trailer.
The “Story logic” step card on the boardStep 2Narrative structure
Once we have the core loop, we need to work out how to spread that experience across the trailer's running time: where the story starts, where it develops, where it peaks, how we hold attention. A good example is the trailer for Dave the Diver. Its loop: dive, explore, gather resources, run into danger, come back, use what you got in the sushi bar, upgrade and dive again. A closed loop: sea - haul - bar - progress - back to the sea.
But the trailer doesn't show that loop as is - we break the experience into blocks of meaning. Dave's trailer is split into six blocks, four of them about the core loop:
One important caveat: Dave the Diver is an example here, not a template. Six blocks aren't a form every trailer fits into. The structure is built each time from the logic of that particular game's core loop, and the edges of the blocks are a matter of convention.
And that's how the basic narrative structure appears: we brought them into the world, explained the basic actions, widened it, strengthened it, locked it in and called them to act. But it's still only a frame - next we bring it to life.
The “Structure” step card on the boardStep 3Drama
How do we bring that structure to life and give it force? With drama: it creates tension and rhythm, and it stirs emotion. Drama is a large discipline in its own right, and it's worth going into properly. Here we'll take the Dave the Diver example we already know and look at which devices it uses, where exactly they sit and how they work.
WHAT DRAMATIC DEVICES ARE FOR
In short: to steer the viewer's attention and feelings. But it's worth understanding why they work: dramatic devices affect us not because clever playwrights invented them one day. They weren't invented from scratch - they were discovered in the way people live through things.
Look at how you live through things yourself. You're always at some point, and you almost always want to be at another: somewhere better, calmer, safer, more interesting. So you start moving towards that point, towards your goal. You hope for something. You run into something. Something helps you, something gets in the way. You lose control - and try to get it back. You do. You breathe out. And you start again.
Those repeating cycles of experience are what we call patterns. They're exactly what drama works with. Not because “that's what the textbook says”, but because it's wired into us. The brain is constantly trying to work out: where am I now, what do I want, what's in my way, what might happen next.
And when a story lands in a familiar pattern, the viewer quickly works out what's going on and starts to expect things - in other words, they're pulled in. From there drama can steer that expectation: confirm it, build on it, hold it back or break it sharply. Which is exactly what we said: steering attention and feeling.
So these patterns turn up anywhere human experience is involved: studying, work, relationships, growing up, any movement towards a goal. And literature, cinema and games have learned to compress those shapes, sharpen them and put them to work in their own medium.
You can see this especially clearly in games, because a game is essentially a controlled model of experience. It has rules, a goal, obstacles, progress, choices, failures, wins, a move to the next level. Plenty of stretches of life are built the same way - we just rarely call them games.
Say you spend a long time inside one “game”. University, for instance. You arrive at the very bottom level and understand almost nothing. Then bit by bit you learn the rules, you develop, you make alliances, you get confident - confident enough, perhaps, to flunk an exam and then heroically retake it. You carry on with mixed success and somewhere near the end of your final year you're king of the hill, a master of the game. And then the game ends - and you're dumped onto level one of the next one: work. New rules again, uncertainty again, the whole cycle to go through again.
That's a dramatic pattern. Not an abstract one, not a bookish one - one every single person knows. And if a game is a set of those same life patterns in more concentrated form, then a game trailer, as a story about the game, is a more compressed version again. In a minute or two we have to answer the viewer's basic, instinctive questions: what role they play, where they are, what they'll be doing, what they're after, what they'll run into, what they stand to lose and win, and why it's worth going through that cycle themselves. The more precisely and clearly we use those patterns, those dramatic devices, the more the viewer is pulled in.
1. CONTRAST
One of the best known and most powerful devices. It works everywhere: in text, in the image, in the cutting, in sound, in structure. All drama is essentially built on opposites colliding: quiet and loud, success and failure, calm and danger.
Even in music, harmony isn't built from identical sounds but from the relations between different ones. Tension and resolution. Consonance and dissonance. And it's between them that what we call movement appears. If the same thing sounds all the way through, it goes flat and dull fast. But once there's difference, conflict, tension and then resolution - that's when we start to feel something. Drama works the same way: contrast creates movement, and movement holds attention.
Dave's trailer has plenty of these, and there's even a literal example - the “he's at the top of his game... and top of the food chain” moment. What happens there: first the hero's status goes up, you get a feeling of control and power - and it's broken immediately. The classic move: raise, then drop. Just like the university example: the king of the hill becomes nobody.
But what does contrast actually do to us inside? At the level of perception it's fairly simple. First we're given an expectation, and the brain starts filling in the situation by its own logic: “right, now they'll show how strong and confident and cool the hero is”. Then the story sharply delivers the opposite - and we can't help reacting. Attention spikes: “hang on, why isn't it what I thought?” On top of that comes emotion, and emotion pins a moment in the memory far better. With Dave the Diver it's a positive emotion too, because the broken expectation is delivered through humour: the moment is funny, so it doesn't just catch your attention, it sticks.
That's why contrast is used at the key points of a trailer: in the hooks, to catch attention; in the joins between blocks, so as not to lose it; at the climaxes, to sharpen the effect. Contrast isn't decoration - it's a tool that creates movement between states. That movement is what produces a reaction, makes us feel something and pulls us further in.
2. TENSION AND RELEASE
The next device is also built on contrast, and it runs through the whole trailer. How it works: it starts with a risk, then the situation gets harder and the tension builds. And once the viewer has tightened up, the trailer releases that tension through humour, absurdity, a failure or some other kind of resolution.
Why does it work? Because the brain needs movement between states. All tension and the viewer wears out. All fun and it gets boring fast. So the ideal is: tighten, breathe out, tighten again. That alternation creates rhythm, and the better the rhythm is built, the more the viewer falls into step with it. Exactly like music: when we hear a good beat we don't merely “understand” that it's good - we feel it in the body, we fall in with it, we move.
In Dave this runs through almost the entire trailer: danger then failure, risk then a joke, tension then an absurd release. It keeps the video pulsing and stops the viewer settling into one state. They don't just follow what's happening - they feel the video move.
3. ESCALATION
Another fundamental device: the experience gets gradually harder and denser. We don't show everything at one speed and one level of saturation - we steadily raise the density of what's happening.
First the viewer is given simple actions. Then new situations are added. Then new mechanics. Then more danger, more chaos, more enemies, more oddities, more consequences. And at some point the viewer feels it: “right, this game is getting bigger”. Across the same stretch of trailer they're getting more information, more action, more emotion, more that's new. But note: this isn't just faster cutting - it's more game experience packed into the same time.
First: “right, I dive and catch fish”, then “oh, there's a sushi bar too”, then “hang on, there are bosses, strange events, upgrades, absurdity, quests, secrets”. That changes the sense of time: the trailer seems to move faster even though its length hasn't changed. Because the viewer doesn't feel seconds - they feel the density of events and actions.
Why does it work? Because the brain needs novelty and development. If the level of difficulty and saturation doesn't rise, attention starts to drop. But when every next block adds something new, attention renews itself: “okay, there's development here, so there'll be more ahead and it'll get more interesting”. So escalation does two jobs at once: it holds attention through novelty and creates a sense of the game's scale through sheer quantity. We're answering the player's question - “will this game keep developing?” - and the trailer answers: yes, it will.
That's why a trailer usually gets denser towards the end - faster cutting, bigger events, more energetic music. It brings the viewer into the pre-finale block at full speed, so they arrive at the call to action with more charge behind their response.
BONUS · TEXT AND PICTURE
Here's one more device from Dave as a bonus, because it shows the link between text and image so clearly. Remember our principle from the formula - a story about the game, told in images?
At the end of the trailer there's a line: “Dive in and guide Dave through the dangerously dark depth of the daunting deep sea”. Hear how it sounds? It uses a literary device called alliteration — the repetition of the same or similar consonants, in this case the plosive “d”. And what do they do next? They carry the device straight over from the words into the picture: the edit starts cutting on those sound accents, on that plosive “d”. The rhythm of the speech becomes the rhythm of the cut. The text isn't just playing over the picture - it starts driving it.
The grammar of the text lines up with the grammar of the visual language, and you get a proper spectacle. There are many more ways to play text against image, but that's a subject of its own.
Step 4Game experience
Before choosing the form, we put into one or two sentences what it's like to play this game. Only the player's feelings and actions, with no list of features and systems. This is what the trailer has to carry, and everything after it leans on this.
The game experience is easy to confuse with the genre experience from the research stage, but they're different things. The genre experience is about the genre: what feeling players come to this kind of game for at all; it works as a filter for hooks. The game experience is about this particular game: what its player feels and what they do with their hands.
The work in short: catch the live feeling of the game and write it down in raw words, take the hooks already selected, answer the questionnaire and pull the result into a short record form. The method itself, the questionnaire, the form and a worked example all live in the “Game experience” step card on the pipeline board.
Step 5Concept
So we know what we're telling: the core loop, the narrative structure and a basic set of dramatic devices. Now for the next question: what form are we going to tell it in?
Because a story - not only in trailers, but anywhere - is always told through some form, some particular way of delivering it. Sometimes that's obvious, sometimes it isn't, but it's always there. And that form is what we call the story's concept . The concept is the format, the lens we tell the story through. It sets the character of the video, sets the tone and lets the viewer see at once what they're looking at and how to take it.
It's like a restaurant. Broadly, every place has the same job - to feed people. But they do it differently, according to their concept. You walk in and almost immediately know where you've ended up: an expensive restaurant, a bar, a coffee shop or a fast-food place. Because the interior, the lighting, the music, the menu, the way the staff behave - all of it follows a particular concept. You haven't tasted the food yet and you already know the format of the experience.
A trailer works the same way. The concept lets the viewer see fast what this is: a serious cinematic trailer (Doors, Submarine), an ironic TV ad (REPO), a vlog or diary (Roadside), a music video, a story told by a character or by the developer, a documentary - or any hybrid of those.
In Dave the Diver the concept goes like this: at first the trailer looks like a third-person Attenborough-style documentary. The game is presented as a study of a living world and the hero as a subject of observation; the narrator describes the hero, the world and the events, and sets how we're to read them. Then it shifts towards something more playful and entertaining, and by the end turns into a classic trailer outright (the cutting intensifies, the density rises). And here that hybrid concept helps a great deal: it drops us into the world fast, explains the mechanics enjoyably, sets the tone - irony, warmth, a light distance - and still leaves room to feel the game experience itself.
It's worth remembering that every video has a concept, whether or not you ever put it into words. Better, of course, to do it deliberately, so you know what you're dealing with and how to use it. It's rather like genre: in a game or a film you know the rules of the genre - how horror works, how comedy works, how action works. And once you know them you can either play by them or break them on purpose. The concept is exactly the same: if you know what yours is, you control how the game comes across; if you don't, it forms by itself, and usually by accident.
So the concept isn't just a fun idea for delivery. It's a tool that shows you how your story works and how the viewer will take it. And the main requirement is this: it grows out of the game experience and strengthens it, rather than being invented separately.
Step 6Outline
Between the concept and the full script there's a required step — the outline: a short retelling of the future story, part by part. Numbered parts, the key scene of each part, the job of each part. The same structure as the script, only without the detail and the lines.
What it's for: the logic gets tested before any detail is put into it. First you find out whether the story works at the level of a plain retelling - and when you do go into detail later, it lands on logic that already works. The usual trap is to fly straight into detail and get tangled in it. And a change here is cheap: rewriting a paragraph of summary isn't the same as rewriting scenes you've already written out.
In form the outline isn't a separate document but a section inside the overall script document, sitting ahead of the full script. And it unblocks the editor. Splitting it into parts gives them ready-made “containers”: the editor sets up the project, lays the material out across the parts and starts filling them with footage without waiting for the finished script, music and lines. In other words, they can start earlier.
What it looks like on a live project is in the section Script: the outline sits there ahead of the full script.
The “Outline” step card on the boardStep 7Script
Once we know what we're telling, how the story is built and what format we're telling it in, we bring it all together into one document. We have our own script template: it works both as a presentation for the team and as a starting point for production. The template has four main elements.
A live example of the template with all four elements is on the page Script.
The “Script” step card on the boardStep 8Creative director check
First, an internal review. We go through four blocks: experience and authenticity (did the concept grow out of the game experience, or was it pulled in from outside for the sake of form?), story and structure (is the logic taken from the core loop, are the parts balanced, is there escalation towards the end?), tone and timing (does the tone hold, do the hooks land on time, does the ending leave the right aftertaste?), and whether it can be made (what can really be captured in the current build, and does the editor know what material is needed). The check ends in a decision: into production, or rework it and check again.
The point is to catch a problem on paper, while fixing it is still cheap, instead of in the edit. The same checks repeat at the key cuts during production.
The full questionnaire for this checkStep 9Producer check
Once the script is assembled, we check with the producer that everything is in place: the logic works, the structure is clear, the parts are balanced, the jobs are covered, the concept reads, the game experience comes through properly. The script is almost a production plan already, and it's better to make changes here than in the edit. On top of that, the game itself often changes while the script is being written: new mechanics appear, assets are added or taken away, priorities shift. So this check isn't a formality - it's an important point of synchronisation.
The “Producer check” step card on the boardPRODUCTION
We have the story in text - now we turn it into pictures. At this stage the script becomes material, edit assemblies, footage, sound, title cards, graphics and finally a finished video. This is where the edit team matters most.
Editor levels
In our pipeline we split the editing process into several stages. We call them levels. Each level is its own kind of work with its own kind of task: in one you gather material, in another you build the story, in another you work on the form or experiment.
We split the editors the same way: each editing level has its own level of editor, depending on the way they think, their skills and the tasks they work with. The levels are flexible: an editor can work at one level or cover several at once if their experience and skills allow. Equally, several people can work at the same level, depending on the complexity and the volume. There are four levels in all; the profiles of all four are on the page Editor levels.
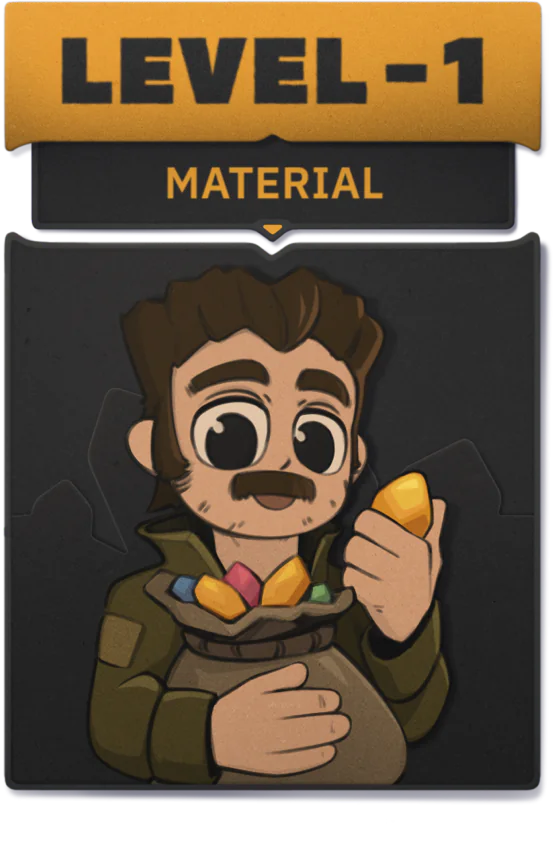
Level 1Material
At this level the material for the trailer is captured, selected and organised. This is the Level 1 editor's work.
How they think. Thinks in terms of material and how to prepare it cleanly. The Level 1 editor doesn't decide how the story gets told - they work to a clear brief - but they know their work is what everything after it stands on.
Skills. Plays the game, captures it, picks the episodes, cuts them, structures them and keeps everything tidy and consistent.
Tools. The Level 1 editor works with the basic tools for capturing, selecting and organising material.
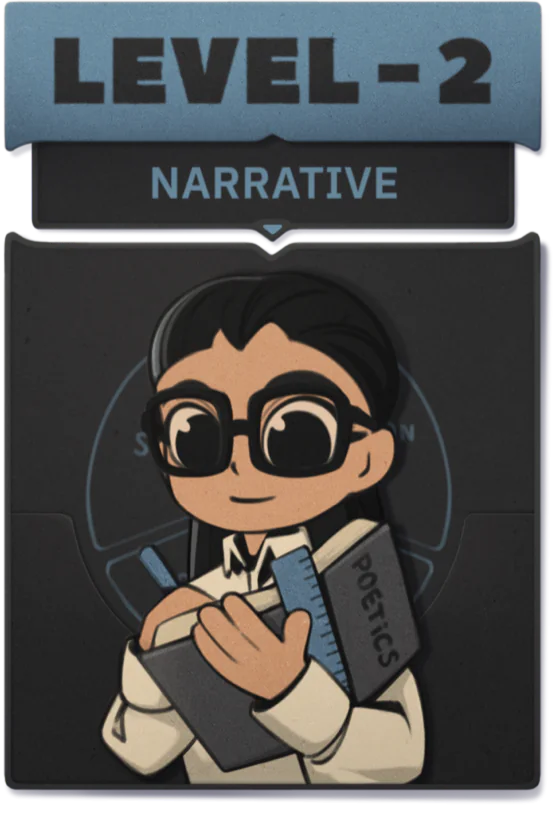
Level 2Building the narrative
At this level the narrative structure of the video is built out of the material gathered. This stage isn't about making it pretty - it's about making the video clear and making it work as a story. This is the Level 2 editor's work.
How they think. The Level 2 editor thinks in structure, sequence and blocks of meaning rather than in techniques. They work out what leads to what, where the viewer follows and where they might get lost.
Skills. Knows the principles of storytelling; picks the track and fits its structure to the structure of the story; checks how the story works in time; feels its pace (can the viewer keep up); understands the sequence and logic of the core loop; assembles a working draft; sets the tasks for the Level 1 editor and leads them; arranges additional capture; and keeps the structure of the video tidy and disciplined.
Tools. Uses the Level 1 toolkit plus templates for setting tasks and picking up extra material.
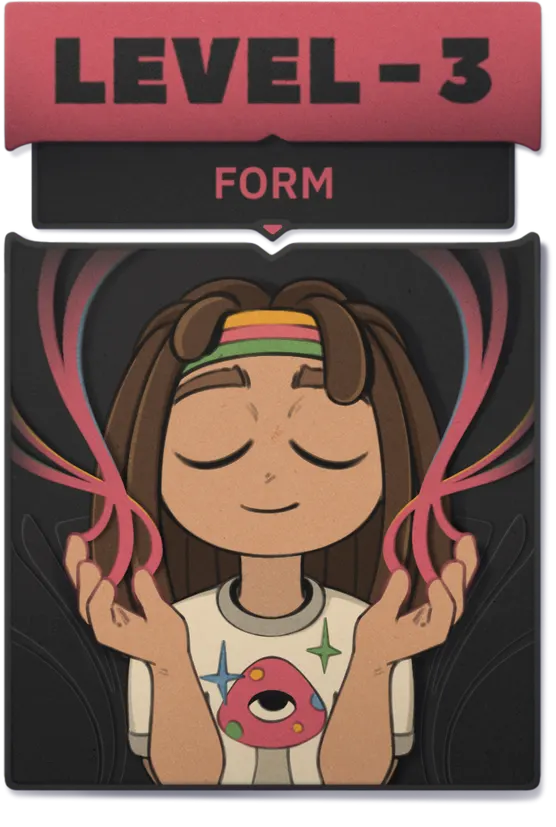
Level 3Form
At this level the work is with visual and editing techniques - rhythm, music, accents, title cards, transitions - making the video more of a spectacle and more expressive. This is the Level 3 editor's work.
How they think. Thinks in form, feeling and energy. Feels where to hook you, where to let go, where to push or slow down, where to switch your attention unexpectedly. Takes the music as the backbone of the video's rhythm and form.
Skills. Strengthens how the video feels by working the form; uses music as the backbone of the edit's structure and dynamics; uses motion techniques and cutting patterns; works with title cards and transitions; works with accents, pauses and contrasts - and knows when to stop.
Tools. On top of the earlier levels' tools, the Level 3 editor uses music libraries; a reference base for motion, transitions, title cards and rhythm solutions; graphics and motion templates (title cards, transitions, accents, visual reinforcement); and a sound library for strengthening accents, transitions and the dynamics of the video.
Level 4Experiments and kits
At this level the original idea of the story is taken and the delivery is experimented with. The job is to find alternative formats. This is the Level 4 editor's work: a researcher and experimenter, the “what if” person.
That way they produce concept variants fast and unpolished, for testing, and lock the good solutions down as repeatable models. Since this is the most advanced level, the Level 4 editor has to command every tool from the levels below.
That's our four-level approach. It helps break trailer production into clear kinds of task: where we gather material, where we build the story, where we sharpen the form and where we look for new solutions. Try looking at your own team and working out who leans towards which level - by skills and by the way they think.
Step 1Script breakdown
So we have a script, and now it has to go into production. We do that with a breakdown. It's essentially an edit plan, where every scene, line and title card is broken into separate blocks, so it's clear which scenes are needed, which shots have to be recorded and which elements have to be made.
It's worth noting that the script template we use is already a good foundation for the editor in its own right. Because it has: a split into blocks that effectively become editing blocks; an understanding of the structure and proportions of the video; a list of key scenes and hooks; title cards and lines; screenshots.
So the editor doesn't start from a blank page - they already have the frame of the future video. At the breakdown stage they turn the script into edit logic: they work out the order of scenes inside each block, pick the key frames, decide where the climaxes go, mark the transitions between blocks and the intended rhythm, and note the missing assets.
Alongside the breakdown we start preparing the elements the trailer will use: we pick the track, look for voice-over talent and rough out motion graphics templates - title cards, transitions and effects. All of it becomes the basis for the next step: assembling the first draft of the video, which we call the Textomatic.
Step 2Textomatic
This is a stripped-down animatic, where blocks of text describing what's happening stand in for images, storyboards or footage. It's the fastest and cheapest way to assemble a first draft of the video. In Premiere we create a timeline, assemble the track cut to the structure of the video, drop the text blocks onto it, put in temporary title cards and, if needed, use a scratch voice-over.
This is the first time we see our story - still in text, but already laid out in time. Now we can test the idea of the video: is the story clear, does the rhythm work, does the mood come through. The structure very often changes right here, and that's normal. Because the Textomatic is our first test pilot: it shows whether the video flies or crashes on take-off. What it looks like on a live project is on the page Textomatic.
The “Textomatic” step card on the boardStep 3Capturing footage
Once the Textomatic is assembled and the structure broadly works, we move on to capturing footage against it: the main gameplay, staged scenes, extra angles and reactions. The build breakdown from the research stage comes back into play here - only now we go into the game not to “get to grips with it” but for specific scenes.
We always use a checklist during capture: it's what gives the scenes full coverage, so the edit has enough material and keeps its flexibility. If we need to show a mechanic, for instance, we don't record just one take of “the player did the thing”. We might record a wide shot of the situation, a closer shot of the action itself, the successful outcome, the failed outcome, the hero's reaction to it, the reactions of the other characters, and a version with the UI and without.
Because during capture it feels like “it's fine, we've got the shot”. And then in the edit it turns out there's no cutaway, no reactions, no clean start, no decent exit from the scene, no alternative take of the action. The checklist saves you that pain in advance.
The “Capturing footage” step card on the boardStep 4Draft 2
At this stage we turn the text into pictures. The captured material replaces the Textomatic's text blocks and it all starts to look like a real video - still rough, but already telling you something: does the story read in pictures, is the game clear, does the rhythm work, do the hooks register.
Very often this is where it becomes clear which scenes are missing or which moments need strengthening. So after this draft we usually put together a fix list and, if needed, plan a pickup session.
Step 5Draft 3
At this stage we sharpen the form. Now we look not only at whether the video is clear but at how well it feels. Here we strengthen the accents, tune the rhythm and the pauses, refine the transitions, add the title cards and the graphics, and animate the packshot.
After that we watch the cut with the producer - the third and last producer check: does it hit the brief, are the game's strengths visible, do the spirit and the game experience come through. We collect the notes, confirm it's ready for finishing and hand the cut on to the next stage - voice-over and sound design.
Step 6Voice-over
At this stage we build the final sound of the video. At its simplest that's SFX, music, voice-over (if there is any) and character lines. After this step the video can be called almost finished.
But there's a special case: co-op games. In this genre another important element appears - live talk between players. That's often what creates the friendslop effect, the feeling that you aren't just watching a trailer but sitting inside the session. So here we work separately on the lines and on how the players interact. We have two approaches to voicing co-op trailers, and each has its pluses and minuses.
How do we do it? We use a hybrid approach. For recording we lean on AI (text-to-voice or voice morphing) and we also record our own voices. Then we process the sound so it comes across as organically as possible, like players actually talking.
We have plenty of successful examples of this approach where nothing sounds staged, and some less successful ones. It's worth being clear that we take this route out of necessity: the flow of projects is large, there isn't always time to wait for perfect recordings, we don't have the resources or the time to bring in actors, and our experience with them has mostly been poor - so doing it ourselves turns out simpler and better. Either way, whichever approach we choose, we end up with a voiced trailer where the rhythm, the accents, the atmosphere and the emotion are stronger.
Step 7Finishing
After the voice-over we have the long-awaited final draft of the video. We watch it as a team, enjoy it, sign it off and pass it to the final stage. The last steps are these:
And out comes a finished trailer, packaged for its task and the platforms it'll run on.
The recap
We've come a long way: we've worked out what makes a trailer good and broken the whole process of making one into steps. Now it's worth stepping back and seeing the picture whole.
We started from the basics - the formula the whole approach rests on: a good trailer is a story about the game, told in images. And our whole method is really just working through each part of that formula in turn.
So the logic is simple: understand the game, pick out what matters, build the story, turn it into pictures, package it, ship it.
And here's the whole route as a single list - the same pipeline that lives on the board. Click a stage to open its steps, and a step to see its description.
The same route on the pipeline board→In closing
So that's the magic. Or rather - as we've established - there's no magic here at all. There's a simple, logical production system. And now it's yours. Which means a good trailer isn't just getting lucky with an editor, or the track just happening to fit, or the game selling itself. A good trailer is the result of a specific process. And if you go through it in order, without skipping steps and without trying to cut something pretty right away, good trailers become a genuinely repeatable result.
We hope this guide is useful to anyone starting to get to grips with trailers, that it helps turn what looked like chaos into a system, and that it gives a little confidence to those who were short of it. Because often what a person needs isn't magical talent or a sudden flash of insight, but a clear map, a few working tools, and the feeling of - okay, I know where to start.
So take this method, try it, adapt it to yourself, do good work and share what you get. And if you have questions or want to talk something through, write to us: the guide has a section called Feedback, with all the workshop's contacts.